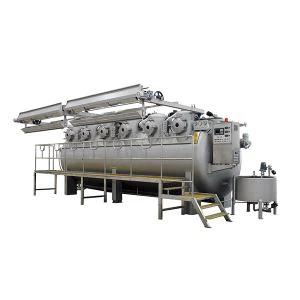
Hey there! As a supplier of High Temperature Overflow Dyeing Machines, I know how crucial it is to keep that dyeing tank in tip - top shape. A clean dyeing tank not only ensures the quality of your dyed fabrics but also extends the lifespan of your machine. So, today, I'm gonna share some effective ways to clean the dyeing tank of a High Temperature Overflow Dyeing Machine.
Why Cleaning the Dyeing Tank is a Big Deal
First off, let's talk about why cleaning the dyeing tank matters so much. Over time, dyes, chemicals, and fabric residues can build up inside the tank. This buildup can lead to uneven dyeing, color bleeding, and even affect the performance of the machine. For instance, if there are clumps of dye stuck in the tank, they can get mixed into the next batch of dyeing, causing inconsistent colors on the fabrics. Also, the chemical residues might react with new dyes, altering their properties and resulting in sub - standard products.
Pre - Cleaning Prep Work
Before you start cleaning, there are a few things you need to do. First, make sure the machine is turned off and has cooled down completely. Safety first, right? You don't want to get burned while trying to clean it.
Next, drain all the remaining dye and water from the tank. This might seem obvious, but it's an important step. Use a suitable drain valve to empty the tank thoroughly. Once the tank is drained, you can remove any large fabric pieces or debris that are visible. You can use a pair of gloves and a small net or tongs to pick out these big chunks.
Choosing the Right Cleaning Agents
Now, let's talk about the cleaning agents. You can't just use any old soap or detergent. You need something that's specifically designed to break down dyes and chemicals. There are commercial cleaning products available in the market that are formulated for dyeing machine tanks. These products are usually alkaline or acidic, depending on the type of dyes and residues you're dealing with.
If you prefer a more natural approach, you can use a mixture of vinegar and water. Vinegar is acidic and can help dissolve some types of dye residues. Mix about one part vinegar with three parts water. This mixture is relatively gentle but can still be effective for light cleaning.
The Cleaning Process
-
Initial Rinse:
After removing the large debris, give the tank a good initial rinse with clean water. This will help wash away any loose particles. You can use a high - pressure hose if possible. This can reach all the nooks and crannies of the tank and do a better job of getting rid of the surface dirt. -
Applying the Cleaning Agent:
Once the initial rinse is done, pour the cleaning agent into the tank. If you're using a commercial product, follow the instructions on the label. Usually, you'll need to add a certain amount of the product to a specific volume of water. Make sure the solution is well - mixed.If you're using the vinegar - water mixture, simply pour it into the tank. Use enough to cover the bottom and sides of the tank. Then, let the solution sit in the tank for about 30 minutes to an hour. This allows the cleaning agent to break down the dye and chemical residues.
-
Scrubbing:
After the soaking time, it's time to scrub. You can use a soft - bristled brush to scrub the interior of the tank. Focus on the areas where there are visible stains or thick residue. Be gentle to avoid scratching the tank, as scratches can provide a place for more residue to build up in the future.
For hard - to - reach areas, you can use a long - handled brush or a pipe cleaner. Scrubbing helps loosen the remaining residues and makes it easier to rinse them away. -
Rinsing:
Once you've finished scrubbing, rinse the tank thoroughly with clean water. Keep rinsing until the water runs clear. You might need to do this multiple times to make sure all the cleaning agent and residues are removed. -
Final Inspection:
After rinsing, take a close look at the tank. Check for any remaining stains or residue. If you find any, you may need to repeat the cleaning process or use a stronger cleaning agent for those specific areas.
Maintenance Tips for a Clean Dyeing Tank
To keep your dyeing tank clean between major clean - ups, here are some maintenance tips. First, make sure to filter the dye liquor before it enters the tank. A good filtration system can catch a lot of the fabric fibers and debris, preventing them from building up in the tank.
Also, run a short cleaning cycle with clean water after each dyeing process. This can flush out any remaining dye and chemicals from the tank and pipes. And don't forget to regularly check the tank for any signs of damage or corrosion. If you notice any issues, fix them as soon as possible to prevent further problems.


Related Machines
If you're in the market for different types of dyeing machines, we also offer some great options. Check out our Jet Dyeing Machine For Crepe Fabric, which is perfect for crepe fabric dyeing. We also have the Normal Temperature Overflow Dyeing Machine for Fabric for those who need a machine that operates at normal temperatures. And if you're dealing with tricot dyeing, our High Temperatre Rapid Dyeing Machine For Tricot Dyeing is a great choice.
Let's Connect
If you have any questions about cleaning your High Temperature Overflow Dyeing Machine or are interested in purchasing one of our machines, don't hesitate to reach out. We're here to help you get the best results for your fabric dyeing needs. Whether you're a small - scale business or a large - scale manufacturer, we can provide the right solutions for you.
References
"Textile Dyeing Machine Maintenance Guide", Industry Publication, 20XX
"Best Practices for Cleaning Dyeing Equipment", Textile Technology Journal, 20XX